Monday, December 29, 2008

A Tale of Two (Potato) Pancakes

Some people wait all year for sweet spring asparagus. Some for the fruits of summer. I wait for potato pancakes.

Now granted, I am aware the potatoes are available much longer than a few precious weeks - heck, you can buy a 20 pound bag of them at the grocery store anytime you want. But growing up in a healthy home where 'frying' was pretty much a dirty word, the holiday season was always our small, indulgent window for such decadent preparations.

Being lucky enough to grow up Jewish and Italian, that means I have not one, but two different potato pancakes to look forward to each winter. Of course, there are those deliciously light and crispy latkes, the requisite shredded potato pancakes doused in sour cream and applesauce that grace our table come candle lighting time (though being a good red-blooded Midwesterner, I always preferred mine with ketchup). But in addition to this jewel of the Jewish culinary landscape, my mother also continues her family's post-Thanksgiving tradition, Italian potato pancakes (pictured above). Packed densley with leftover mashed potatoes and lots of parmesan and parsley, these cheesy, emerald-specked beauties couldn't be more different than my father's version. And yet, I love them every bit as much. What a nice little metaphor.

The holiday season may be over, but that's no reason that potato pancake season should be. I hope you try both. Ketchup is permitted. Just don't pick sides.

Italian Potato Pancakes
Leftover mashed potatoes (about 6 cups worth)
2 eggs
1 cup freshly grated parmesan cheese
1/4 cup dried basil leaves
1 tsp garlic powder
1 tsp salt
1/2 tsp black pepper
2-4 tbsp flour, depending on how firm your mashed potatoes are

Flour, for dredging
Olive oil, for frying

Mix all ingredients by hand in a large bowl, adding less flour if your potatoes are stiff, more if they're creamier. (FYI, this dish is best with stiffer mashers, ones made with starchy potatoes and less milk). Form poatoes into patties, about 4 inches in diameter. Fill a large saute pan or an electric skillet with olive oil, at least 1 inch deep. Heat oil over medium high heat, 375 degrees for the electric fryer. As the oil is getting hot, dredge the pancakes in flour to coat; dust off excess. (It is best to do this right before frying, because if they sit too long the flour soaks into the potatoes). When the oil is hot, add the pancakes in batches, being careful not to crowd the pan. Fry until golden brown on one side, about 3-4 minutes, then flip and repeat. Drain on paper towels. Serve immediately.

Potato Latkes
6 medium potatoes
1 small onion
1 tsp salt
1 egg
3 tbsp matzoh meal or breadcrumbs
½ tsp baking powder

Wash, peel and grate potatoes, then squeeze dry with paper or regular towels. Grate and add onion to potato, then add salt and egg and mix well. Mix in remaining ingredients. Drop by spoonfuls into hot oil that is deep enough to almost cover the latkes. Brown on both sides, drain and serve with applesauce and sour cream (or ketchup).

Sunday, December 28, 2008

Love Dish: Citrus-Rosemary Roasted Chicken

Welcome back, everyone! I hope you all had a wonderful, relaxing, food-filled vacation. I spent the majority of my holiday sitting around my parents' kitchen making some of our favorite family recipes (and taking meticulous notes), and I'm excited to share them all with you soon. In the meantime, though, here's a simple dish that I made last night. After all the feasting of Christmas was behind us, we wanted a dinner that required very little effort. A few chickens in the freezer, some oranges in the fridge, and the hardy rosemary bush in the backyard were all we needed.

Citrus-Rosemary Roasted Chicken
2 5-lb roasting chickens
2 oranges
6 rosemary sprigs
1/4 cup olive oil
1 tsp kosher salt
1/2 tsp coarsely ground black pepper

Preheat the oven to 450 degree.

Remove the giblets from the chickens and either save for another use or discard. Wash the chickens inside and out and pat dry. Sprinkle the cavities with salt and pepper. Cut each orange in half; squeeze the juice of both halves over the skin of one chicken and stuff the cavity with the rinds. Repeat with the other chicken. Place one rosemary sprig in each cavity. Pull the leaves off the remaining sprigs and chop finely. In a small bowl, combine the olive oil, rosemary, and salt and pepper. Spread evenly over both chickens, rubbing with your hands to coat evenly.

Place both chickens in a large roaster and place in oven. Immediately lower the heat to 350 and roast for 1 1/2 hours, or until a meat thermometer placed in the thickest part of one of the chicken's thighs reaches 175. Remove from oven; tent with foil and let rest for ten minutes. Carve and serve.

Sunday, December 21, 2008

Love Dish: Carrot Cake with Cream Cheese Frosting


As I mentioned in a previous post, I believe some of the very best fall/winter desserts are made with some very humble vegetables. After all, who can think of a more season-appropriate dessert than carrot cake? Moist, crumbly, and full of holiday spice, you have to actually make it yourself to believe that a whole pound of healthy, crunchy carrots are in there. And honestly, this version is so perfect on its own, you could almost skip that fluffy, decadent layer of cream cheese frosting on top...almost.

Carrot Cake with Cream Cheese Frosting
Adapted from January 2009 issue of Food and Wine magazine.

Cake
2 cups all purpose flour
2 tsp baking powder
2 tsp baking soda
1 tsp cinnamon
1 tsp salt
1 cup vegetable oil
1/2 cup milk
1 1/2 tsp pure vanilla extract
4 large eggs
2 cups sugar
1 pound carrots, peeled and shredded

Frosting
2 sticks unsalted butter, softened
2 8-oz packages cream cheese, softened
1 tbsp pure vanilla extract
2 cups confectioners' sugar

Preheat oven to 325. Butter two 9 inch cake pans. Line with parchment paper and butter again.

In a bowl, whisk the flour, baking powder, baking soda, cinnamon and salt. In a small bowl, whisk together the oil, milk and vanilla. In your stand mixer (or in a large bowl using an electric mixer) beat the eggs and sugar at high speed until pale, about 5 minutes. Beat in the liquid ingredients, then beat in the dry ingredients just until moistened. Stir in the carrots. Divide the batter between the pans and bake the cakes for 55 minutes to 1 hour, until springy and golden. Let the cakes cool on a rack for 30 minutes, then remove from pans and let cool completely.

To make the frosting: Beat together the butter and cream cheese on high speed until light, about 5 minutes. Beat in the vanilla, then the confectioners' sugar; beat at low speed until incorporated. Increase the speed to high and continue mixing for another 3 minutes, until the frosting is light and fluffy.

Peel the parchment paper off each cake. Place one layer, upside down, onto a plate. Spread a rounded cupful of the frosting on the top, then sandwich the second cake on the icing, right side up, . Spread the top and sides of the cake with the remaining frosting and refrigerate until chilled, about an hour. Slice and serve.

Thursday, December 18, 2008

Love Dish: Chocolate Chip Cranberry Cookie Bars

Hello, my name is Lisa and I'm a recovering Starbucks addict. I'm proud to say that the siren call of the cafe mocha rarely has even a weekly pull for me, much less the daily one it used to command. However, come wintertime, sneaking away from work for a warm shot of comfort and caffeine is ever present in the back of my mind. And, thanks to a delicious treat this fancy shmancy coffee chain features each holiday season, it's even harder for me to resist right now.

The cranberry bliss bar beckons to me from behind the glass display. I don't even notice its espresso and toffee crunch cousins sitting nearby who used to tempt me so. A blondie brownie base, topped with a snowy drift of creamy icing and a festive sprinkling of tart cranberries...it really is just that - bliss in a little brown bag.
Come January, it's always so sad to see them go; as if the end of the holidays isn't depressing enough. So, I figured, why not recreate this divine concoction at home so I can enjoy them anytime I want? (And, of course, what sweet creation couldn't be improved upon by adding a little chocolate?) The result: definitely blissful, and the perfect holiday treat - no $4 coffee required.

Chocolate Chip Cranberry Cookie Bars
For the cookie base:
2 1/4 cups all purpose flour
1 tsp salt
1 tsp baking soda
3/4 cup sugar
3/4 cup brown sugar
2 sticks unsalted butter
1 tbsp pure vanilla extract
2 eggs
6 oz (half a bag) of semi-sweet chocolate chips
For the icing:
1 stick unsalted butter, softened
1 8-oz package cream cheese, softened
1 tsp pure vanilla extract
1 cup powdered sugar
3/4 cup dried cranberries
Preheat the oven to 350 degrees.

In a medium bowl, sift together the flour, salt and baking soda. In a large bowl with an electric mixer, or in your stand mixer with the paddle attachment, cream the butter, sugars and vanilla together until light and fluffy. Add each egg one at a time, beating well after each. Add the flour in three shifts, mixing fully after each addition. Fold in the chocolate chips.

Spray a cookie sheet with nonstick spray. Spread the cookie mixture evenly across the sheet, about 1/2 inch thick, leaving an even amount of space around the edges (the cookie with expand when cooked). Bake for 20-22 minutes, or until the cookie/bar is firm and cooked through, but not too brown. Remove from the oven and let cool in the pan for a few minutes. Loosen from the pan using a rubber spatula and transfer cookie bar to large cutting board (you can cut in in half to transfer it if that makes things easier).

For the icing: Beat the cream cheese, butter and vanilla together until light and fluffy. Sift the powdered sugar and add it to the bowl, beating for about 3 minutes until shiny and smooth. Spread the icing over the cookie bars, sprinkle with the cranberries and refrigerate for about an hour. Cut into squares.

Wednesday, December 17, 2008

Love Dish: Meatballs from the Motherland


Is there anything more supremely comforting than the sight of a big bowl of spaghetti and meatballs greeting you after a long winter day? If you're Italian (or Italian at heart) the answer is most likely no.

There are many levels of commitment you can choose from when making this bastion of Italian comfort food. You could make your own meatballs, buy a can of of sauce and a box of pasta, and call it a day. Or, for all you Barbara Kingsolvers-in-training out there, with space and time for such things, you can use that tomato sauce you canned last summer. (Lucky ducks). OR, and here's where things get serious, you could go all out and make your own pasta, too. I should point out that this third, industrious option should be reserved only for lazy weekend days, not hungry weekday nights, and I freely admit that late on a cold, rainy Tuesday I went with the first choice. (However, stay tuned for many upcoming posts on homemade pasta - mommy just got a new KitchenAid attachment).

Whatever level of commitment you choose to devote to this dish of love, making the meatballs yourself is the baseline. And to be sure, though every Italian family has their own cherished recipe, my version - or, more accurately, my great grandmother's - though supremely simple, is pretty tough to beat.

Motherland Meatballs
1 1/2 pounds ground beef (90 percent lean)
1/2 cup bread crumbs, preferably fresh,* but from the can is fine
1/2 cup freshly grated Parmesan
1 tbsp dried oregano
1 tbsp kosher salt
1 tsp freshly ground black pepper
2 large eggs
2 jars (28 oz) of your favorite spaghetti sauce

In a large bowl, combine everything but the sauce. It is best to mix with your hands to make sure everything is full mixed together, but not overworked.

In a large stockpot, add one of the jars of spaghetti sauce. Add about 1/2 cup of water to the jar, swish around to get the last bit of sauce, and add to the pan. Mix together.

With your hands, roll the meat mixture into uniformly shaped balls. Do this by cupping the meat, a little less than a 1/4 cup's worth, between your palms and quickly moving your hands in opposing concentric circles while applying gentle pressure (it sounds harder than it is). Add the meatballs one by one to the pot of sauce.

Cover with the remaining jar of sauce. DO NOT STIR. Raise the heat to medium. When the sauce begins to bubble, cover the pot, lower heat to medium low, and let simmer for 30-40 minutes, giving the pot a few good twists now and then to "stir" the meatballs. (To check for doneness, remove a meatball and slice in half).

Boil a pot of water for your spaghetti. When the spaghetti is al dente, remove from heat, drain, and add some of your sauce to coat the noodles. Serve with the meatballs and lots of freshly grated Parmesan. Manga!

*To make fresh breadcrumbs, cut the crusts of a few slices of white bread and pulse in a food processor until you have coarse crumbs.

Sunday, December 14, 2008

Shrimp and Two Potato Chowder

This quick dish is an easy twist on a classic winter soup. I originally had a hankering for New England clam chowder, but 1) I had no clams, 2) I can't really eat cream - well I can, but I suffer dearly for it - and 3) I had an overabundance of multi-hued potatoes that needed eating. So, no, it's not clam chowder - not a thing like it really, except that I'm calling it a chowder - but it is delicious, and that's what matters.

Shrimp and Two Potato Chowder
2 tbsp olive oil
1 large sweet onion, diced
2 cloves garlic, minced
1 tsp garam masala, optional
1 large sweet potato, peeled and cut in large cubes
3 or 4 small red or new potatoes, or 1 large russet or Idaho potato, cut into large cubes
Salt and pepper
1 tsp dried thyme
1 quart vegetable stock (Kitchen Basics is my favorite)
2 cups whole milk (or cream, or 2 percent, whatever you have on hand - just don't use skim)
1 pound large shrimp, shelled and deveined

In a large stock pot over medium high heat, heat the olive oil. When shimmering, add the onion and saute, stirring often, until softened, about 3 minutes. Add the garlic and all the potatoes. Sprinkle with salt and pepper to taste, and the garam masala, if desired. (It's not necessary, but it gives the soup a certain something - a special depth of spicy, earthy flavor. A little curry powder would also work well). After a few minutes, add the vegetable stock, scraping the bottom of the pot to loosen any browned bits; add the milk, thyme, give the whole thing a stir, and then simmer on medium heat, until the potatoes are tender, about 10 minutes. Just before serving, add the shrimp - they'll cook through in 1-2 minutes. Ladle into bowls and serve.

Friday, December 12, 2008

Great Dish: Lamb Sliders at Zola

To be sure, there is many a delicious little burger gracing the ‘starters’ and bar menus of DC restaurants these days – the Matchbox’s minis, The Source’s kobe beef concoctions, the tuna tartare sliders at PS7. I love this trend, not just because I love burgers in general, but because they're an economical and judicious app choice when dining with friends (everyone gets their own)! After dining at Zola in Penn Quarter this week, I have a new addiction to add to the list. Zola's seasonal slider offering features juicy lamb meatballs on house made sticky buns, each topped with grilled romaine, a fiery pepper slaw, and a dollop of creamy goat cheese aioli. Savory, spicy, crunchy, sweet – what else could you ask for in a first bite?

Thursday, December 11, 2008

Quick Dish: Calzone with Swiss Chard and Mozzarella

Remember that beautiful pizza dough I told you about a few posts back? Remember how I said it takes a little time to make, but then you'll have extra dough ready at a moment's notice for a delicious dinner? This is that delicious dinner.

Calzones are uber Italian comfort food. Warm, puffy dough folded around your choice of hearty filling, with the requisite ooey, gooey, melted mozzarella spilling out...Hot Pockets have nothing on these babies. I took the dough out of the freezer last night, it was ready for me when I got home from work today, and we were eating calzones in 20 minutes flat. Faster than Pizza Hut, and waaay better.

Calzone with Swiss Chard and Mozzarella
1 ball of pizza dough, preferably homemade, but store bought is fine
1 bunch of swiss chard, washed and chopped
1 tbsp olive oil
Salt and pepper
2 small balls fresh mozzarella, sliced
Olive oil, for brushing
Cornmeal, for dusting

Place a baking stone on the middle rack of your oven and preheat it to 450 degrees.

Heat a large skillet over medium high heat. Add a tablespoon of olive oil; when hot, add the swiss chard. Sprinkle with salt and pepper. Saute for about 5 minutes, until wilted and tender. Remove from heat.

Rub a pizza peel with cornmeal. Separate the dough into two pieces and stretch each to form a uniform circle, about 6 inches across. Place each disk on the peel and brush each with a little olive oil. Divide the swiss chard and the mozzarella between the two calzones, arranging them on the top half of each circle. Fold the bottom half of the dough over the filling. With a fork, crimp the edges together to seal. Lower the heat in the oven to 400 degrees. Slide the calzones onto the baking stone and bake for 10-15 minutes, until golden and firm. Remove from the oven and serve warm, dipped in the tomato sauce you preserved this summer (or the can of Prego you have in the cupboard).

Wednesday, December 10, 2008

Quick Dish: Cranberry Chicken Salad Sandwiches


Ah, lunch.

Such an important meal of the day. And during the work week, "going out" for it saves you from a whole host of of bothersome things - hunger, boredom, a stuffy office, an annoying co-worker. But as fun as going out to lunch is, it definitely does not save you money, or time. If you're short on both, I'm guessing your brown bag it most days. And though in doing so you're being oh-so-good, I'm also guessing you open that bag feeling a wee bit grumpy about what a great meal you could be having. Hrmph.

Sufferers of lunch remorse, this quick dish is for you. When I brown bag it, I try to pack a meal that I would actually want to order somewhere, not just the usual hum drum home fare. So, whenever I make chicken for dinner, I cook extra so I can make this lovely salad the next day. (It's also a great use for the uneaten half of that store-bought roast chicken you couldn't resist). It couldn't be simpler to make, and this time of year, those lovely specks of celery green and cranberry red are very festive, no? I prefer it on hearty pumpernickel, but any old bread will do. So make chicken tonight and no more boring lunch tomorrow. Voila!

Cranberry Chicken Salad Sandwiches
Makes enough for two sandwiches

One leftover chicken breast (about 6 ounces)
2 ribs of celery, diced, green leaves included
A handful of dried cranberries
3 tbsp mayo
2 tsp honey mustard
Salt and pepper to taste

Mix together ingredients. Make sandwiches. Pack sandwiches.

Eat at work. Ignore annoying coworker.

Sunday, December 7, 2008

Happy Birthday Muffins


Today is December 7 - a date which will live in infamy. It also happens to be my birthday. When I woke up this morning, Rory, my newly minted husband, asked what I wanted to do to start off my day. My first inclination was to go to the Dupont Farmers Market, like I do most Sundays, and then stop by Starbucks or Teaism for a cup of something warm and a delicious morning treat. But looking out the window I determined that I was entirely too wimpy to venture out into the frigid day. If I wanted a sweet treat, I was better off making it myself. The clear choice - muffins.

I am a life long muffin lover. I'm sure I get this predilection from my father, who not only would bring home batches every weekend from Perkins, our favorite local bakery in Cincinnati, but has also been known to do his fare share of muffin experimentation. I love them all - bright lemon poppies, tart cranberry-orange, nubby oat bran. But, if we're all being honest here, I think we can agree that nothing compares to a blueberry muffin, all crumbly golden and speckled with luscious pockets of purple-blue. My absolute favorite muffins are those treated to the added decadence of a shower of crunchy, sugary streusel. And seeing as it's my birthday, I figure I get a calorie pass today.

So, here's my little birthday present to myself, a combination of versions I've tried over the years. It doesn't have to be your birthday for you to enjoy them, too - just a day in need of a little sweetness.

Blueberry Muffins with Brown Sugar Streusel
1 1/2 sticks (3/4 cup butter) unsalted butter, at room temperature
1 1/2 cups sugar
3 eggs
1 1/2 tsp pure vanilla extract
1 cup sour cream
1/3 cup milk
2 1/2 cups all purpose flour
1/2 tsp baking soda
2 tsp baking powder
1/2 tsp kosher salt
1 cup frozen blueberries
1/2 cup dried blueberries

Streusel Topping
1/4 cup rolled oats
1/4 cup brown sugar
2 tbsp butter

Note: this recipe makes 9 large or 18 regular muffins.

Preheat the oven to 350 degrees. Place paper liners in muffin tins.

In bowl of electric mixer fitted with the paddle attachment, cream the butter and sugar until light and fluffy, about 5 minutes. With the mixer on low, add the eggs, one at a time, and then add the vanilla, sour cream and milk. In a separate bowl, mix together the flour, baking soda, baking powder and salt. Add the flour mixture to the butter mixture and beat on low until just mixed. Remove the bowl from the stand and fold in the blueberries.

In a small bowl, mix together streusel ingredients with a fork or your fingers, until crumbly.

Scoop the batter into prepared muffins pans, filling each cup just to the top. Sprinkle streusel mixture evenly over muffins. Bake for 30 minutes for large muffins, 18 minutes for small muffins, or until lightly browned on top and a toothpick inserted comes out clean.

Wednesday, December 3, 2008

Best Pizza in DC = Your Kitchen

Yes, DC has a lot of seriously good pizza parlors. And now there's even an outpost for buying fancy pies you can bake at home. But who needs all that when you can make your very own kitchen the best spot in town for a slice? While making your own pizza may sound like way too much work for a weeknight, trust me, with a little advance planning and some fun kitchen gadgets, you - yes, you! - can be turning out beautiful, crispy/chewy/bubbly vessels of Italian goodness. Talk about an ego trip. Here's all you need:

A Pizza Stone - Truly, the only way to get that deliciously crispy bottom crust.

A Pizza Peel - The only safe way to get your pizza onto said stone.

The Toppings - Right now I'm particularly fond of spicy sausage, olives, kale and mozzarella (pictured), but, of course, whatever your heart desires.

The Dough - As any pizza conouisseur worth her crust knows, when it comes to good pies, it's all about the dough. Nowadays, nearly every grocery store in the land offers ready-made pizza dough, and that's all well and good. However, if you've got a sturdy mixer, I urge you to make your own. The store-bought stuff really just can't compare, and the recipe below could give 2 Amy's a run for its pie-making money. This dough also freezes well, so one night of work equals multiple nights of pizza enjoyment.

Pizza Dough
Recipe from Baking with Julia

The Sponge
1 1/2 tsps active dry yeast
1 1/2 cups tepid water (about 80 degrees)
2 tbsp olive oil
2 1/4 cups unbleached all purpose flour

Place yeast in a medium bowl (you can use the bowl from your mixer) and add the water, stirring to dissolve the yeast. Allow the yeast to rest for about 5 minutes, until it turns creamy. Stir the oil into the mixture and then gradually stir in the flour, mixing until well incorporated.

First Rise: Scrape down the sides of the bowl, cover, and let the sponge rest in a warm place for about 1 1/2 hours, or until the sponge is very bubbly and has risen to about double its volume.

The Dough
The sponge (above)
2 to 2 1/4 cups unbleached all purpose flour
2 to 3 tsps salt, depending on your taste

If you didn't make the sponge in the mixer bowl, transfer it to that bowl now. User a rubber spatula to deflate the sponge, which will be sticky and loose, and fit the mixer with the dough hook. Add 2 cups of the flour and the salt to the sponge and mix on low speed for 2 to 3 minutes. Increase the mixer speed to medium and, if the dough isn't coming together nicely, sprinkle with a little more flour by spoonfuls. Continue to knead on medium speed for another 4 to 5 minutes, until the dough is smooth and elastic.

Second Rise: Place the dough in a lightly oiled large bowl, turn the ball over so that its entire surface is coated with the oil, cover, and allow to rest in a warm place for another 1 1/2 hours, until is has doubled in bulk.

To Make the Pizza
Position a rack in the lower third of the oven, and fit the rack with a baking stone. Preheat the oven to 475. Rub a baker's peel with cornmeal and set aside.

Shaping the Dough: Turn the dough ont onto a lightly flour work surface and divide into two pieces. Keep one piece covered as you work with the other. (If you do not want to make both pizzas now, wrap one piece of dough tightly in plastic wrap and store it in the refrigerator for a day or two or freeze for up to a month. Thaw frozen dough in the refrigerator overnight and bring chilled dough to room temperature before shaping). Shape the dough into a ball and then flatten it into a disk. Turn and streth the dough, or roll out with a rolling pin until the dough is about 1/4 inch thick. Transfer to peel.

Topping and Baking: Top with the ingredients of your choice, leaving a 1-inch border around the rim, and slide the pizza into the oven. Bake for 13-15 minutes, or until the topping is bubbling and the uncovered rim is puffed and golden.

Monday, December 1, 2008

Love Dish: Butternut Squash and Apple Casserole

Well, several cities and 1500 miles later, we have safely returned from our Great Midwest Thanksgiving Tour. And I can I safely say I am officially Thanksgivinged out.

Not that I didn’t enjoy all that intensive cooking and feasting – that’s what I live for. And it was great to see both sets of parents and extended family, not only because I honestly like them, but because the newlywed “why-we-should-visit-my-family-and-not-yours” game is not actually as fun as it sounds. It's just that re-entry into everyday life is a lot more jarring following a 14-hour, drizzly, trafficky return road trip. So I'm thinking maybe Thanksgiving can be at our house next year.

Whining now concluded, allow me to offset my crankiness by sharing a dish I am especially thankful for each Thanksgiving – my mother’s butternut squash and apple casserole. She’s been making this since I can remember, since the days it seemed exotic to me for anything labeled a vegetable to go into a something labeled a dessert. But, as many of us are well aware nowadays, butternut squash lends a wonderfully creamy, autumnal sweetness to anything it’s paired with, making it a fine addition for any stop along a meal – dessert included.

Note: there are many butternut squash and apple casserole recipes floating around that call for simply cubing the squash, cubing the apples and tossing some brown sugar on top before baking. Ignore those. Yes, this recipe's a little more involved, but I'm betting it's the best butternut squash dish you've ever had. Really.

Butternut Squash and Apple Casserole
1 medium butternut squash, halved lengthwise
3-4 large Granny Smiths, or other good variety of baking apple
2 tbsp butter
1/8 cup sugar
Dash of pure vanilla extract, optional

For the topping:
1/2 cup rolled oats
1/2 cup chopped pecans
1/4 cup brown sugar
2 tbsp butter

Preheat the oven to 400. Place the two squash halves, cut side up, on a foil-lined baking sheet. Roast in the center of the oven until a fork passes easily through the flesh, about 45 minutes to an hour.

While the squash is cooking, peel the apples, core them, and cut into smallish cubes. Heat 2 tbsp of butter in a large saute pan over medium high heat. When melted, add the apples and the sugar and saute, tossing occasionally, until the apples are softened, about 8 minutes. Set aside.

When the squash is done, remove from the oven and lower the heat to 350. Let the squash cool slightly before peeling off the skin. Mash flesh in a small bowl, adding a tablespoon or two of brown sugar if you think it needs to be a little sweeter. If you're a vanilla fan, add a dash of vanilla to the squash. Fold the apples into the squash and pour into a 9x9 buttered casserole dish.

In a small bowl, mix the topping ingredients together, using your fingers or a fork to incorporate the butter until you have a crumbly mixture. Sprinkle evenly over the squash and apples. Bake the casserole uncovered in the center of the oven for about 25 minutes, until heated through.

Monday, November 24, 2008

Happy Thanksgiving!


Dish-trict is on vaca right now, kicking off the Great Midwestern Cities Thanksgiving Tour (2008 edition). I hope everyone has a relaxing and delicious holiday, and I hope to be back soon with some wonderful new Heartland- and in-law-inspired recipes to share.

Tuesday, November 18, 2008

Love Dish: Heart Break Cake


I am not the least bit ashamed to admit that I am completely in love with Nigella Lawson (at left). I mean, besides reminding scores of women that being a domestic goddess is awesome, thank you very much, it’s also pretty easy to assume that the term ‘food porn’ was coined just for her – not because she’s gorgeous (which she is), but because the dishes she blithely threw together on her myriad cooking shows always looked so absolutely, indecently delicious. Her cookbooks are no different. In my favorite, Nigella Bites, she shares a recipe for a chocolate cake with pictures so enticing you’d be hard pressed not to lick the page.

Seriously though, looks notwithstanding, this is the best chocolate cake I've ever eaten. And that's saying something.

The title of this post is what it is, because, as Nigella says, “This is the sort of cake you’d want to eat the whole of when you’ve been dumped. But even the sight of it, proud and tall and thickly iced on its stand, comforts.”

Chocolate Fudge Cake
Serves 10. Or 1 with a broken heart.

For the cake:
2 2/3 cups all purpose flour
¾ cup plus 1 tbsp granulated sugar
1/3 cup light brown sugar
¼ cup best quality cocoa powder
2 tsp baking powder
1 tsp baking soda
½ tsp salt
3 eggs
½ cup plus 2 tbsp sour cream
1 tbsp vanilla extract
¾ cup unsalted butter, melted and cooled
½ cup corn oil
1 1/3 cups chilled water

For the fudge icing:
6 ounces bittersweet chocolate, minimum 70% cocoa solids
1 cup plus 2 tbsp unsalted butter, softened
1 ¾ cups confectioners’ sugar, sifted
1 tbsp vanilla extact

Preheat oven to 350.

Butter and line the bottom of two 8-inch cake pans.

In a large bowl, mix together the flour, sugars, cocoa, baking powder, baking soda and salt. In another bowl whisk together the eggs, sour cream and vanilla until blended. Using a standing or handheld mixer, beat together the melted butter and the corn oil until just blended, then beat in the water. Add the dry ingredients all at once and mix together on slow speed. Add the egg mixture, and mix again until everything is blended and then pour into the prepared tins.

Bake the cakes for 45-50 minutes, or until a toothpick comes out clean. Cool the cakes in their pans on a wire rack for 15 minutes, and then turn the cakes out onto the rack to cool completely.

To make the icing, melt the chocolate in the microwave for 2-3 minutes on medium, or in a bowl sitting over a pan of simmering water, and let cool slightly.

In another bowl beat the butter until it’s soft and creamy, and then add the sifted confectioners’ sugar and beat again until everything’s light and fluffy. (Nigella says she knows that sifting is a pain, but you have to do it or the icing will be unsoothingly lumpy). Then gently add the vanilla and chocolate and mix together until everything is glossy and smooth.

Sandwich the middles of the cake with about a quarter of the icing, and then ice the top and sides, too, spreading and smoothing with a rubber spatula.

Thursday, November 13, 2008

Quick Dish: Fall Hash


If you have some leftover salmon that needs eating, here's a Fall-tastic, 5-ingredient quick dish for you (well, technically it has 8 ingredients, but I figure the s+p and the olive oil are a given). It's oh-so-easy and works great for dinner or brunch. The salmon makes the hash plenty filling on its own, so I suppose the poached egg isn't really necessary, but who wants their hash without that lovely yellow trickle of goo? Not this girl.

Salmon and Sweet Potato Hash
1 bunch of Brussels sprouts, ends and loose outer leaves removed, halved
1 large sweet potato, peeled and cubed
1 medium sweet onion, diced
2 fillets (or about 8 ounces) leftover salmon
2 eggs
Salt and pepper
Olive oil

Preheat the oven to 400.

Toss sprouts in a little olive oil and s+p, arrange in a single layer on a foil-lined baking sheet, and roast for 20 minutes, stirring occasionally to caramelize evenly.

While the Brussels sprouts are roasting, heat a tablespoon of olive oil in a large nonstick saute pan over medium high heat and add the sweet potato cubes. Saute for about 10 minutes, until tender but still firm and beginning to brown. Add the onions and saute until soft, about 5 minutes, adding a little more olive oil if the pan gets too dry. Add the Brussels sprouts and the salmon and cook until the fish is warmed through. Add salt and pepper to taste.

Keep the hash warm while you heat a pan of water for poaching the eggs. (Adding a few drops of vinegar will help the eggs hold together). When the water is simmering, gently slide in the eggs and poach for two minutes, longer if you prefer less runny yolks. Remove with a slotted spoon and dry on paper towels. Divide the hash between two plates and top each with a poached egg.

Wednesday, November 12, 2008

Quick Dish: Marie's Salad

Marie is my lovely mother and this is her, and my, favorite salad. Whenever I go home, it's pretty much a given that I'll find feta in the fridge and dried cranberries in the cupboard, ready for that night's dinner. We alway sprinkle in some toasted pine nuts for crunch, but pecans are another great option; dried cherries are a delicious stand-in, as well. And here's our little secret - soak the dried fruit in some good red wine for about 15 minutes before tossing everything together. It plumps them up and lends a wonderfully deep flavor to the salad...and drinking the cranberry-sweetened wine isn't half bad, either.

Marie's Salad
1 head romaine lettuce
1/2 cup crumbled feta
1/2 cup dried cranberries
1/2 cup good red wine
1/2 cup pine nuts

Vinaigrette
3 tbsp. balsamic vinegar
1 tbsp. honey mustard
Salt and pepper
5 tbsp. olive oil

Soak the cranberries in the wine for about 15 minutes. Drain and set aside. Drink the wine when no one's looking.

Chop the romaine roughly and arrange in a big salad bowl. Sprinkle the feta, cranberries and pine nuts. Set aside.

To make the vinaigrette, whisk together the vinegar and mustard in a small bowl. Add salt and pepper to taste. While whisking, add the olive oil in a slow and steady stream until emulsified.

When ready to serve, give the vinaigrette another quick whisk to combine and drizzle over the salad.

Tuesday, November 11, 2008

Quick Dish: Chicken-Tomatillo Enchiladas

Got a craving for Mexican? One jar o' salsa to the rescue! This tastes as good as most of the enchiladas you can get around town, and you don't have to change out of your pajamas to enjoy them.

Chicken-Tomatillo Enchiladas

1 lb. chicken tenders, chopped into small pieces
1/2 onion, chopped
1 16-oz. can tomatillo salsa
Dash of cumin
Dash of cayenne pepper
Salt and pepper
1 tbsp olive oil
6 whole wheat flour tortillas
Shredded Monterey Jack cheese
1 ripe avocado, optional

Preheat the oven to 350.

In a small bowl, mix together the chicken, 1/2 cup of the salsa, cumin, cayenne pepper and salt and pepper to taste. Let marinate for 15 minutes.

Scoop the pulp out of the avocado into a small bowl. Add salt, pepper and a little garlic powder and mash with a fork. Set aside.

In a nonstick saute pan over high heat, add the olive oil. When the oil is shimmering, pour in the chicken mixture and saute, stirring often, until the chicken is cooked through, about 5 minutes. Set aside.

In a shallow baking dish, pour about 1/2 cup of salsa on the bottom and spread to coat. Add a few tablespoonfuls of the chicken filling down the center of each tortilla, sprinkle with a handful of cheese, and roll tightly. Place each tortilla seam-side down in the baking dish. Pour the remaining salsa over the enchiladas, covering completely, and sprinkle with additional cheese. Bake for 10 minutes, or until the enchiladas are warmed through and the cheese is melty. Serve the enchiladas topped with some of the mashed avocado.

Monday, November 10, 2008

Love Dish: Soup's On


What with all the chopping and simmering, I admit that making a big pot of beef vegetable soup doesn't really constitute a quick dish. However, if like me, you spend the majority of your Sunday evenings cooking a big meal to last through the week, come Monday and Tuesday you'll be able to enjoy this hearty meal 5 minutes after you walk in the door.

What's better, vegetable-based soups are excellent vehicles for using up any surplus veggies you have on hand, particularly all those wonderful root varieties that are in abundance this time of year. Just take into account their respective cooking times - i.e., potatoes take awhile to cook, mushrooms don't - when tossing into the pot.

Beef Vegetable Soup
2 tbsp olive oil
1 lb. beef (look for "stew meat"), cut into 1-inch cubes
2 lbs. (about 10) small new potatoes, quartered
1 lb. (about 6) carrots, chopped large
2 sweet onions, chopped large
1 can whole peeled tomatoes
Freshly ground black pepper
1 quart beef stock
1-2 cups of water
2 bay leaves
1/2 lb. green beans, ends snipped and cut into 2 inch pieces
6 ounces button mushrooms, cleaned and halved
Salt and pepper to taste

In a large stock pot, heat the olive oil until smoking. Add the beef and brown on all sides, about 4 minutes. Add the potatoes, carrots, and onions; sprinkle with black pepper and stir to combine. Add the peeled tomatoes, squeezing between your fingers to break them up. Add the beef stock, bay leaves, and 1-2 cups of water if necessary so that you have a good amount of broth. Cover and let simmer, stirring occasionally. After about an hour and fifteen minutes, add the green beans. Ten minutes later, add the mushrooms. Let simmer another 10 minutes, until the mushrooms are cooked through but still firm. Adjust seasoning with salt and pepper if needed. Serve with crusty bread for dunking.

Sunday, November 9, 2008

Quick (Comfort Food) Dish: Pastina

When I have a cold, or a crappy day at work, or pretty much any kind of bad experience that justifies some serious comfort food consumption, most often I find myself looking to my Italian roots for inspiration. And while most creations in the comfort genre require a considerable amount of time to prepare - think pot roasts, homemade spaghetti and meatballs, chocolate cake - my favorite is also one of the quickest, and classic Italian comfort food at its very best.

My grandma calls this dish pastina - literally little pasta. (Technically, that's the name of the tiny pasta used, not the milk/pasta/butter mixture she created, but hey, who's going to question Grandma?) She made it for my mom whenever she was sick, and Mom always used it as an antidote for pitiful children, whether they were the result of illness, lost soccer games or mean boys. So when I sit down with a warm bowl of pastina, I don't know which I owe it to more - the soothing starch or my childhood memories of these two wonderful women - but either way, I can't help but feel very comforted.

Note: While both ladies always used pastina/acini de pepe, these particular types of pasta can be hard to find. Orzo (pictured above) works just as well.

To make pastina: Fill a saucepan with water, salt liberally, and bring to boil. Add a cup of pastina (or orzo). Cook until al dente. Drain the water from the pan and add 2 cups of milk. Heat through, add 2 tablespoons of butter and mix to melt. Serve warm, adding more salt if desired.

Wednesday, November 5, 2008

Mmmmm, Focaccia


Now I'm not expecting you to be nearly as nerdy/masochistic as I am and spend two days making your own homemade focaccia. But hey, if you have the mixer and the patience, let your bread freak flag fly. Because the focaccia recipe below, courtesy of Baking with Julia, is some of the best bread I've ever eaten. Which, by the way, only strengthens my credo that olive oil makes everything, everything, better. Gotta love those Italians.

In addition to Katie's purist version of focaccia enjoyment above, these loaves are also excellent for sandwiches. The old man particularly loved when I sliced a big piece in half, smeared it with hummus, and topped it with chopped olives, fresh mozzarella and greens. (In fact, I believe his exact words were, "This is the best f-ing sandwich ever.")

So go forth and bake, my friends, and let me know how it turns out. And please, send along any favorite bread recipes you have, as this nerd is going to need her fix again soon.


Focaccia
2 ¼ to 2 ½ cups tepid water (about 90 degrees)
2 tbsp active dry yeast
¼ cup olive oil
6 ½ cups unbleached all-purpose flour (I love King Arthur’s brand)
4 tsp salt

Mixing the dough: Whisk ½ cup of the water and the yeast together in the bowl of a mixer. Set the mixture aside for 5 minutes, until the yeast dissolves and turns creamy.

Meanwhile, pour 1 ¾ cups warm water into a large measuring cup, add the olive oil, and whisk to blend; sets aside. Whisk the flour and the salt together in a large bowl and set this aside as well.

Pour the water-oil mixture over the yeast and stir with the whisk to blend. Add about half of the flour and stir with a rubber spatula just to mix. Attached the dough hook, add the remaining flour, and mix on low speed for about 3 minutes, or until the dough just starts to come together. If the dough appears dry or a little stiff, add a few drops of warm water, scraping the bowl and hook if necessary to incorporate the water and create a soft dough. Increase the mixer speed to medium-high and continue to mix for about 10 minutes, scraping down the hook and sides of the bowl as needed, until you have a soft, slightly moist, extremely elastic dough that cleans the sides of the bowl.

First rise: Transfer the dough to a work surface and form it into a ball. Place the dough in an oil bowl, turn it around to cover it with oil, and cover the bowl tightly with plastic wrap. Allow the dough to rise at room temperature until doubled in bulk, about 1 to 1 ½ hours.

Second rise: Fold the dough on itself to deflate it and let it rise again until doubled and billowy, 45 minutes to an hour.

Shaping and resting: Fold the dough over on itself again to deflate it (as you do this, you can hear the bubbles squeak and pop) and turn it out onto a work surface. Using a metal dough scraper or a knife, cut the dough into 3 equal pieces. Shape each piece into a ball.

The dough needs to be refrigerated for between 24 and 36 hours. (It is this long refrigerated rest that gives the focaccia its characteristic chewy texture and surface bubbles). Place each ball into an oiled gallon-size zip lock bag and refrigerate.

About 1 ½ hours before you plan to bake, remove the dough from the fridge and gently take the balls out of the bags. Place the dough on a lightly floured surface, dust the tops of the balls with flour, then cover loosely but completely with plastic wrap to keep the tops from getting crusty. Let rest for 1 hour, until the dough reaches a cool room temperature.

The Topping:
Olive oil
2-3 tbsp chopped fresh herbs, such as rosemary and/or thyme
Coarse sea salt

Position an oven rack in the lower third of the oven and preheat to 450. Line two baking sheets with parchment paper and sprinkle with cornmeal.

Shaping the dough: Use your palm to press down gently on each piece of dough, causing bubbles to appear on the sides, then slit the bubbles with a knife. Gently pull and stretch each piece of dough int a square about 10 inches across, taking care not to overwork the dough. Let the dough relax, covered, for about 10 minutes.

Baking the bread: Transfer the focaccias to the baking sheets. Brush the focaccias with oil, sprinkle with herbs and sea salt, and put them in the oven. Bake the breads for 15-20 minutes, or until they are golden with heavy speckling of small surface bubbles. (If you have a water bottle, spray the oven three times with water during the first eight minutes of baking. This creates steam which helps the focaccia bake properly. FYI – like most people, I don’t have a random spray bottle just lying around, so I skipped this step). As soon as you remove the focaccias from the oven, brush them with a little additional olive oil and transfer them to a rack to cool before serving.

Storing: The focaccias are best the day they are baked, but once cooled, they can be wrapped airtight and frozen for up to 2 weeks. Thaw the breads, still wrapped, at room temperature and warm them in a 350 oven before serving.

Tuesday, November 4, 2008

Quick Dish: Macadamia Nut Crusted Halibut

I am ridiculously tardy in posting about all the wonderful food I got to enjoy whilst honeymooning in Maui, and I promise, it’s coming. But in the meantime, since I’m too lazy to do the full write up, but too antsy what with this election going on to just sit here, I’ll tell you about the so-simple-yet-so-good dinner I made last night, thanks to a package of macadamia nuts I picked up in the duty-free store on the way home.

This is a unique little riff on the ubiquitous pecan-crusted trout, but, if I do say so myself, I think even better. In Hawaii, of course, mahi mahi was the chosen fish, but any flaky white version will do. Just don’t feed the leftovers to your dog. Apparently macadamia nuts are poison to their little systems. Who knew.

Macadamia Nut Crusted Halibut
2 6-ounce filets halibut or other flaky white fish
3/4 cup dry roasted salted macadamia nuts
¼ cup grated parmesan cheese
Freshly ground black pepper
1 egg
1 tbsp olive oil

Preheat the oven to 350.

Pat the fish filets with a paper towel. Crack the egg into a wide, shallow bowl and beat lightly. Set aside.

Place the macadamia nuts into a zip lock baggie, seal, and pound lightly to crush. Pour the nut pieces into another wide shallow bowl, add the cheese and freshly ground pepper to taste, and stir to combine.

Dip one side of the filets into the egg and then press into the nut/cheese mixture, patting down gently to adhere the coating.

Place a large nonstick sauté pan over high heat and add olive oil. When the oil shimmers, add the fish, nut side down, and sauté for about 2 minutes, until the crust is golden brown. Flip the fish over and transfer the pan into the oven. Cook until the fish is flaky white, but not overdone, about 6-8 minutes.

Serve with a leafy green salad, preferably with balsamic vinaigrette.

A Bread Odyssey

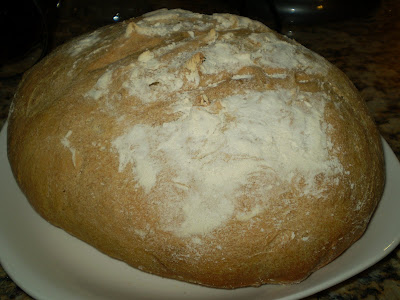
Behold, I have made….bread.

Ok, so it wasn’t very good bread – kinda tough, not very tasty, and with a conspicuous lack of those lovely little air bubbles all the stupid baking books keep telling me about. But still, it was homemade bread. That I made. With yeast and flour and hours and hours of impatience while it rose in a ‘cool dark place.’ Hey, it’s no artisan sourdough ciabatta loaf, but it’s a start.

So, despite my mediocre first attempt at the domestic goddessness that is bread baking, I’m not giving up. Because there really is something incredibly gratifying about creating that delicious bread baking smell in a city apartment approximately the size of a loaf pan. (And more importantly, because my brand new KitchenAid mixer is taking up over half my counter space and I have to justify its presence somehow). So bear with me, dear readers, as I continue on my bread odyssey. If nothing else, I should have pretty pictures to share.

Oh, and don't forget to vote.

Monday, November 3, 2008

Slurp Soup for a Good Cause

When chilly weather arrives and gray, icky sweater season is upon is, there's nothing better than a warm bowl of soup after a long day of slushing through the cold. Now, there are no shortage of options around town for this bastion of comfort food, so why not get your dose while also supporting a good cause? For the enitre month of November - National Diabetes Month - the menu at Oceanaire will feature a heart-healthy version of beef barley soup (pictured at right), the proceeds of which will be donated to the Capitol Chapter of the Juvenile Diabetes Research Foundation (JDRF) to support research aimed at curing diabetes and its complications.

This is the eighth time that the popular downtown seafood spot has dished out a soup to benefit JDRF during National Diabetes Month. Kudos to Oceanaire and Chef Rob Klink for supporting a great mission with great food.

Thursday, October 30, 2008

Love Dish: Cinnamon Rolls with Cream Cheese Frosting


There are many things I love about Molly Wizenberg - her blog, of course, her witty writing, her fabulous pictures, her delicious recipes. But what I think I may love most about Molly is that she decided to share this recipe for cinnamon rolls a few months ago in her Bon Appetit column. They are perfect - light as air, intensely moist and cinnamon-y, and deliriously decadent. And if, like me, you have a brand new, fancy-shmancy KitchenAid mixer and have sworn to bake every bakeable thing your little heart ever dreamed of baking, these definitely need to be near the top of your list.

Cinnamon Rolls with Cream Cheese Frosting
Dough:
1 cup whole milk
3 tablespoons unsalted butter
3 1/2 cups (or more) unbleached all purpose flour, divided
1/2 cup sugar
1 large egg
2 1/4 teaspoons rapid-rise yeast (from 2 envelopes yeast)
1 teaspoon salt
Nonstick vegetable oil spray

Filling:
3/4 cup (packed) golden brown sugar
2 tablespoons ground cinnamon
1/4 cup (1/2 stick) unsalted butter, room temperature
Glaze:
4 ounces cream cheese, room temperature
1 cup powdered sugar
1/4 cup (1/2 stick) unsalted butter, room temperature
1/2 teaspoon vanilla extract

For dough: Combine milk and butter in glass measuring cup. Microwave on high until butter melts and mixture is just warmed to 120°F to 130°F, 30 to 45 seconds. Pour into bowl of stand mixer fitted with paddle attachment. Add 1 cup flour, sugar, egg, yeast, and salt. Beat on low speed 3 minutes, stopping occasionally to scrape down sides of bowl. Add 21/2 cups flour. Beat on low until flour is absorbed and dough is sticky, scraping down sides of bowl. If dough is very sticky, add more flour by tablespoonfuls until dough begins to form ball and pulls away from sides of bowl. Turn dough out onto lightly floured work surface. Knead until smooth and elastic, adding more flour if sticky, about 8 minutes. (*Or, just switch to your dough hook attachment and keep kneading in the bowl). Form into ball.

Lightly oil large bowl with nonstick spray. Transfer dough to bowl, turning to coat. Cover bowl with plastic wrap, then kitchen towel. Let dough rise in warm draft-free area until doubled in volume, about 2 hours.

For filling: Mix brown sugar and cinnamon in medium bowl.
Punch down dough. Transfer to floured work surface. Roll out to 15x11-inch rectangle. Spread butter over dough, leaving 1/2-inch border. Sprinkle cinnamon sugar evenly over butter. Starting at 1 long side, roll dough into log, pinching gently to keep it rolled up. With seam side down, cut dough crosswise with thin sharp knife into 18 equal slices (each about 1/2 to 3/4 inch wide).

Spray two 9-inch square glass baking dishes with nonstick spray. Divide rolls between baking dishes, arranging cut side up (there will be almost no space between rolls). Cover baking dishes with plastic wrap, then kitchen towel. Let dough rise in warm draft-free area until almost doubled in volume, 40 to 45 minutes.

Position rack in center of oven and preheat to 375°F. Bake rolls until tops are golden, about 20 minutes. Remove from oven and invert immediately onto rack. Cool 10 minutes. Turn rolls right side up.

For glaze: Combine cream cheese, powdered sugar, butter, and vanilla in medium bowl. Using electric mixer, beat until smooth. Spread glaze on rolls. Serve warm or at room temperature.

Monday, October 27, 2008

Quick Dish: Gnocchi. Yes Gnocchi.

Ok, I know when you want to throw together a quick meal, your first thought isn't, "Hey, I think I'll make pasta from scratch!" But hear me out. All you need is a potato, an egg and a little flour, and in about 20 minutes you too can be enjoying your own fresh little pillows of heaven.


Here's all you need to remember:
1 large russet potato
1 lightly beaten egg
¼ cup flour
Salt and pepper to taste

Easy right? That's the basic ratio, and it will give you 1-2 healthy servings' worth of gnocchi. Just multiply this amount by the number of servings you want to end up with.

(FYI - I originally got this no fail ratio from a certain too-skinny, too-smiley Italian Food Network star. I wish I could hate her, but heck, this is a great recipe).


Here's how to make them:

Pierce the potato all over with a fork. Microwave the potato until tender, about 6-8 minutes. Cut the potato in half lengthwise and scoop out the flesh into a large bowl; discard the skin. Using a fork, mash the potato well, then mash in the salt and pepper. Mix in 3 tablespoons of the egg; discard the remaining egg. Sift the flour over the potato mixture and knead just until blended – do not over knead.


Divide the dough into 4 equal pieces. Roll each piece between your palms and the work surface into a 1/2-inch-diameter rope (about 20 inches long).


Cut the dough into 1-inch pieces. If you have one of those fancy, ridge-making doohickies that give your gnocchi their trademark ridged look, by all means, now’s the time to bust it out. Rolling the pieces over the tines of a fork works just as well, too. To be honest, though, I usually skip this step: time consuming + unnecessary = not a quick dish.

Cook the gnocchi in a large pot of boiling salted water until the gnocchi rise to the surface, about 1 minute. Continue cooking until the gnocchi are tender, about 4 minutes longer. Using a slotted spoon, remove the gnocchi from the water.


Now’s the time to add them to a pan of sizzling butter and thyme or sage, or you could simply toss them with olive oil and fold in some fresh mozzarella. Crispy prosciutto is also a good addition. So is basil. Oh, I could go on…

Friday, October 24, 2008

I Say Potato, You Say...Mash?

The Washington Post's weekly restaurant review is up, and the focus this go-round (finally) is Commonwealth in Columbia Heights. Tommy S. is a fan of the place, particularly the assorted cured meats, innards and other unidentifiable meat creations offered on the charcuterie plate, as well as the hearty Sunday night roasts. Oh, and the scotch eggs (that's eggs rolled in sausage and then fried, people), pictured at right.

So what say you, readers? Are you a fan of Jamie Leeds' swanky take on British pub fare? Or is it just a little too British-y/offal-y for your tastes?
(Photo: WP)

Thursday, October 23, 2008

Newest Guilty Pleasure: Chocolates at Locolat


Is $8 too much to spend for 4 teensy little pieces of candy? Probably. But when they're lovely and artsy and from Locolat, the teensy little Belgian chocolate shop on Florida Avenue in Adams Morgan, you can almost convince yourself it's worth it. Almost.

Pictured above: pistachio chocolate - fresh pistachio paste covered with bittersweet chocolate ganache; feuilletine chocolate - crunchy, KitKat-like filling made with hazelnut paste and feuilletine and covered in ganache; and a vanilla macaroon (rose macaroon not pictured - willpower lost prior to photography).

Sunday, October 19, 2008

Quick Dish: Brussels Sprouts

Well, we're back. And weirdly enough, it feels like we never left. Rory and I have gotten right back into our pre-wedding/honeymoon routine, including sexy activities such as buying groceries and cleaning the bathroom. In fact, the only thing that really seems to have changed (besides my name and some pesky legal details, of course) is the weather here in my fair city. When we left at the beginning of October, the days were still fairly warm. Now, walking to the neighborhood Harris Teeter this Sunday, my requisite t-shirt and flip flops ensemble was just not cutting it. So apparently summer left while we were gone. Bummer.

The only cure for my the-honeymoon's-over-and-now-it's-cold-out blues? Fall comfort food, of course. Brussels sprouts are one of my favorite fall vegetables, and believe it or not, they're real comfort food to me (which probably has something to do with the amount of butter and garlic I always use with them).

Brussels sprouts are super versatile, both to cook and to pair with other fall flavors. One of my favorite ways to prepare them, which happens to be my mother's way, is a great verion for purists: simply boil the brussels spourts whole for about 15 minutes, then add butter, garlic powder - yes, I said powder - and s+p to finish. In recent years, though, I've been branching out in my cooking methods. Roasting, for example, brings out a wonderfully nutty flavor to the sprouts - just halve them and toss with olive oil and salt and pepper, place on a lined baking sheet, and roast at 450 for 45 minutes, and see for yourself.

Sauteing is probably the quickest and easiest way to cook Brussels sprouts. Tonight, that's the version I chose. I took a bunch of whole Brussels sprouts, about 20 or so, cut off the bottoms and removed their loose outer leaves, and sliced them finely. I added a tablespoon of olive oil to a hot nonstick pan and added two cloves of finely chopped garlic and 2 slices of finely crumbled fake bacon. (You could add real bacon, too; Ijust didn't have it on hand). After a minute I added the sliced sprouts to the pan and tossed to coat with the flavored oil. I sprinkled with salt and pepper, added 2 tbsp of butter to the pan, and continued to saute, tossing often on medium high heat, until the sprouts were tender but firm and beginning to caramelize. Served alongside some skin-on mashed potatoes, I was in my happy place - and definitely looking forward to the bounty of fall.

So, what's your favorite way to cook these little beauties?

Monday, October 13, 2008

Shameless Self Plug

Shh - I'm still technically on my honeymoon, but I couldn't resist sending out a little shameless request for help. Check out the link below to EndlessSimmer's pine nut recipe contest, and if you are so inclined, please take a minute to vote for yours truly - but only if you're a fan of bacon-wrapped, cheese-stuffed goodness, of course.

http://www.endlesssimmer.com/2008/10/10/who-cooked-it-better-pine-nut-contest/

Sunday, September 28, 2008

Dish-trict is Getting Hitched!


My handsome groom and I will be out of commission for awhile - first in Ohio for the wedding, and then in Hawaii for some serious relaxing. Check back in a few weeks for write ups on our tasty travels!

Wednesday, September 24, 2008

Love Dish: Brown Rice with Butternut Squash, Wild Mushrooms and Salami

Don't be fooled by the title. This love dish (i.e., a dish that take a little more time to put together than your standard quick dish) is not your typical, boring, "I guess we should use brown rice to up our fiber intake" health fare.

I buy a particular kind of long grain basmati brown rice that has a wonderfully nutty aroma and flavor and never ever gets gummy. Seriously, I actually like eating it. So when it came to what to mix in, I dug around my fridge for stuff that would work well with that nutty canvas. I knew the earthy wild mushrooms I needed to use up would pair well, plus the salty-smokiness of all things pork was a no brainer (hence the tad overzealous use of it in this recipe). Finally, to really celebrate the beginning of fall properly, I threw in some sweet and creamy roasted butternut squash for good measure.

So like I said, no boring brown rice here - we're talking serious comfort food. And if it happens to help you with your, um, regularity issues, well, that's just an added bonus.

(Note: If you wanted to turn this into a quick dish, you could always use white rice and buy one of those packages of cubed squash, but really, why spoil all the fun?)

Brown Rice with Butternut Squash, Wild Mushrooms and Salami

For the rice:
1 cup long grain basmati brown rice
2 cups water

For the rest:
1 butternut squash, about 2-3 lbs
1 tbsp olive oil
3 slices pancetta, chopped
3 shallots, sliced fine
8 ounces assorted wild mushrooms, such as shitake, crimini and oyster, cleaned and rough chopped
2-3 ounces salami, chopped into small pieces
1-2 tbsp chopped fresh rosemary
2 tbsp chopped fresh parsley
Grated parmesan, optional

Combine the rice and the water in a small saucepan over high heat. Bring to boil, stir once, then cover tightly and cook on very low heat for 45 minutes. Meanwhile, split the squash in half, place on an aluminum foil-lined baking sheet and roast in the oven at 400 degrees for 45 minutes or until tender. Remove and let cool.

In a large saute pan, add the olive oil over medium high heat. When hot, and the chopped pancetta and let cook, stirring often, til it starts to get crisp. Add the shallots and cook until soft, about 2-3 minutes. Add the chopped mushrooms to the pan and cook until tender but still firm, about 3-4 minutes. (You can add a little more olive oil to the pan if the contents starts to look dry). Add salt and pepper to taste. Remove from heat.

When the squash is cool enough to handle, remove the skin and chop the flesh into bite-size cubes. Return the saute pan to the the stove over medium heat and add the squash, salami and rosemary; cook to heat through. Add the rice to the pan and stir to combine. Re-season with salt and pepper if necessary. Sprinkle with parsley and grated parmesan and serve.

Sunday, September 21, 2008

Food Mag Recipe of the Week: Cilantro and Yogurt Sauce

This week's food mag recipe comes from the October 2008 issue of Food and Wine, which featured an entire spread of recipes from DC's own Vikram Sunderam (at left), head chef at Rasika. F&W created simplified versions of several of Sunderam's most popular dishes, including mango shrimp, lamb rogan josh, and this fabulous cilantro and yogurt sauce.

Now I just have to decide what to do with it...spooned over baked salmon? Tossed with steamed potatoes? Or just go all out and make Sunderam's chicken tikka, as well? Such a tasty dilemma...

(Photo: Washington Post)


Cilantro and Yogurt Sauce

2 cups cilantro leaves
1 cup mint leaves
1 jalapeno, seeded and coarsely chopped
4 garlic cloves, crushed
1 tsp ground cumin
1 tbsp fresh lemon juice
1 cup plain whole milk yogurt
Kosher salt

In a blender, combine the cilantro, mint, jalapeno, garlic, cumin and lemon juice and puree to a paste. Add the yogurt and puree until smooth. Season with salt.

Sauce can be refrigerated up to 2 days.